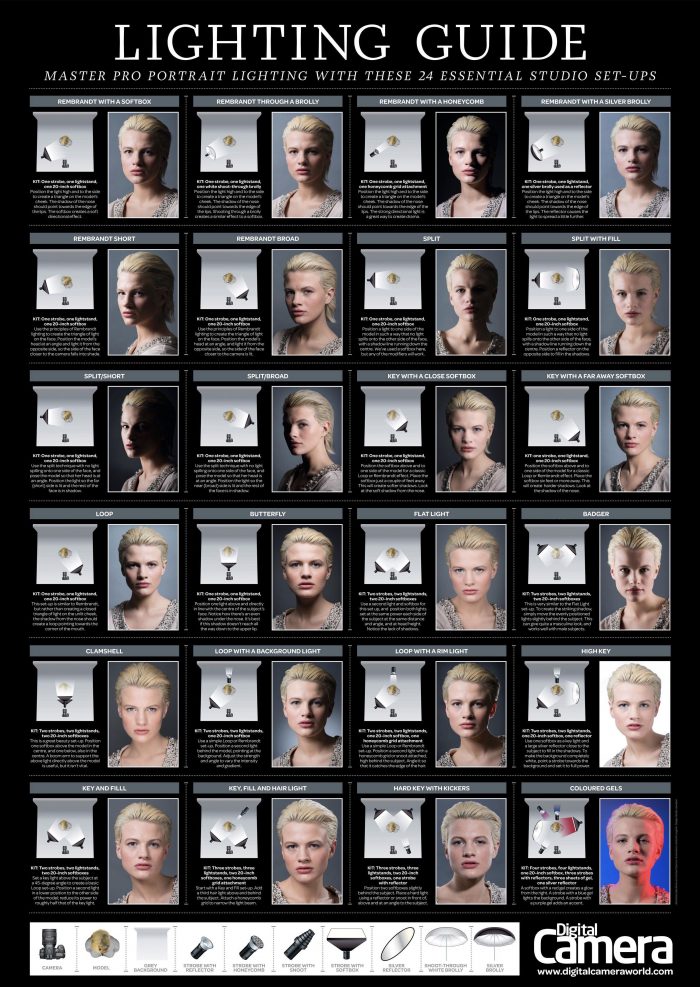
Have you ever wanted to learn how to light a portrait? Well, you’re in luck! We’ve compiled this guide to help you get started. You’ll be able to do it all by yourself—no need for a professional or even an assistant. Just follow these simple steps and you’ll be taking pictures that would make any professional jealous. Welcome to the lighting guide! In this article, we’ll be going over the 24 master pro portrait setups. These are tried-and-true setups that you can use to create stunning images. The best part is that they’re all simple, so you won’t have to spend hours learning how to set up your lights. As a portrait photographer, you can’t just go out and shoot whatever you want. You need to know what’s going on in the world of lighting, and how it affects your work. So let’s get started!
Mastering the basics of portrait lighting is essential for any photographer who wants to learn how to take amazing pictures. There are many different ways to set up a portrait and create interesting effects, but I’ve narrowed it down to 24 that I think every photographer should know how to do.
You don’t need to be a master of lighting to shoot beautiful portraits.
Lighting is not hard, it’s not expensive, and it doesn’t have to be complicated or mysterious either. You don’t even have to know how to do it yourself—you can hire a professional! The truth is that when you learn what works for your subject and environment, you’ll discover that the results are well worth the investment of time and money (not just on lights but also on posing).
So, we’ve outlined our top 24 lighting set-ups and give you some tips on how to create them. It’s important to remember that these setups are just suggestions; they aren’t the only way of doing things! The key is finding what works best for your subject and using that knowledge to create beautiful portraits. If at first you don’t succeed, try again with a different approach until you get what you want!
